Make your own satellite dish
 Building a satellite dish and receiver is easier than ever. Many companies would rather have you rent the equipment and pay an installer to come and put in your system. However, modern satellite systems can be installed with a few tools in addition to the equipment that can be purchased from mainstream manufacturers. While some electronics aficionados may wish to build their own systems, it is recommended that systems be purchased from electronics dealers. Any build-your-own kits or systems would be cost-prohibitive, given the low cost of purchasing a system that is basically plug-and-play.
Things You'll Need
- Television
- Compass
- RG-6 coax cable
- Grounding rod
- Grounding cable
- Zip ties
- Satellite dish mount
- LNB element mount
- Wrench set or ratchet set
- RTV silicone or equivalent sealant
- Magnetic level
- 5-foot chain link fence line post (optional)
- Concrete (optional)
Step 1
Find a location in your yard or from your house where you can have a clear line of sight to the selected satellite. To do this you need to find out the magnetic azimuth and elevation that you will be looking for from your satellite provider. Using the compass, locate a spot that has a clear shot, avoiding any buildings, other structures and trees. All of these can significantly interfere or completely block the signal from the satellite.
Step 2
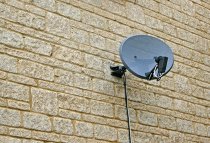
Decide how you will mount the satellite. If your selected location is next to your home, it is possible to mount the dish on the side of the house, or on the roof. However, a side mount is always preferable over a roof mount, as a roof mount is harder to seal off and protect against leaks. If your selected location is in the yard, you can purchase a standard 5-foot chain link fence line post to use as the mounting mast for your dish. The post can be secured in a hole between 18- and 24-inches deep using standard concrete.
Step 3
Ensure that whatever mounting system you use is level. Using a magnetic level, check four sides of the mounting post to make sure that it is straight up and down vertically. If it needs to be adjusted, make the adjustment now. Failure to do so will result in a much more difficult time later trying to fine-tune the satellite dish.
Step 4
Assemble the satellite dish by attaching the LNB mounting element to the back. Align the four center holes and secure with the bolts, lock nuts and washers supplied with the manufacturers' original equipment. Using a wrench set or ratchet set, preselect the elevation as indicated by the satellite programming provider and secure it in place.
Step 5
Run the RG-6 coaxial cable from the back of the satellite receiver where it is marked "LNB" to the dish location. Routing the cable through the LNB element mount, connect to the LNB. Secure the LNB element to the mount and secure the RG-6 cable to the mounting structure with the zip ties, providing a "drip loop, " allowing rainwater to fall off the cable rather than run into the LNB element.
Step 6
Secure the grounding wire to the mounting bracket and run to the grounding block supplied by the equipment manufacturer. The grounding block must then be connected to the coax cable, as well as the grounding rod. This allows any lightning to be routed to the ground, rather than to the receiver inside the house.
Step 7
Point the dish in the approximate location of the magnetic azimuth indicated by the satellite provider and your compass. This will provide your starting point for fine-tuning the dish. Turning on the TV and navigating the receiver menu to the installation process, you will find an operation that will enable you to see the signal strength on your TV. Adjust the dish accordingly, using 1/8-inch increments. First move the dish left and right to get the highest possible signal, then adjust the elevation up and down as well. Once the highest signal possible has been achieved, lock down all adjusting bolts. Call your satellite TV provider to set up programming, or do a channel scan on your system if you are surfing for free-to-air channels.
Tips & Warnings
- Double check all of your azimuths and elevation angles twice before setting up the dish mount.
- Remember that winter trees without leaves will have leaves in the summertime-avoid them.
- If shooting your dish over a tree, remember that trees can grown 1 to 2 feet per year and plan accordingly.
- Always connect the LNB prior to turning on the system to avoid possible damage from low voltage.

|
C2G / Cables To Go 41084 Hex Crimp F-Type Connector - 20PK CE (C2G)
|

|
Engino Inventor Build 90 Motorized Multi-Models Building Kit Toy (Elenco Electronics Inc)
|
Related posts:
 How to make squash How to remote control desktop using lan tricks Tricks for keeping marks off your nose when wearing sunglasses Quickbooks help how to enter tips…
 As both J.D. Power and Associates and Consumer Reports have noted, satellite enjoys a superior customer service rating among its multichannel competitors. Sustaining…
 What does tin stand for Tips on how to breed better dragons in dragonvale Linus tech tips how to build a pc what does negative mean what is capital murders mean…
 Simply activate the receiver through an existing DISH account or subscribe to a new Pay-As-You-Go programming package. Pathway X2 can point to either Western or…
 A Dish Network digital video recorder (DVR) is controlled by a specialized remote that is provided with it. The Dish Network remote uses a code that allows it to…